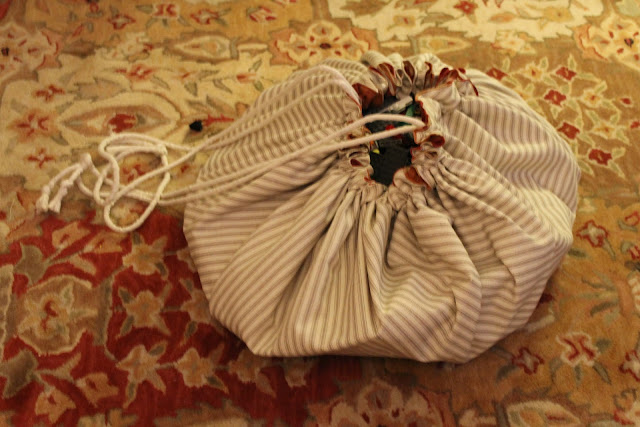
Lego Sack For Jack!
I have been wanting to make this Lego Sack forever and a day ever since I saw it over at Make It Perfect
I finally got up the courage to do it. See I'm not much of a sewer. I don't really like to measure stuff and I can never usually find my sewing scissors unless I go out into the backyard and dig through the dirt. If you have a boy you are nodding your head right now.
But hey, I finally figured out how to keep my sewing scissors all my own ( I hide them!) and I had some great fabric and I was tired of stepping on Legos in my bare feet - Ouch!
Now I didn't write a tutorial, I suggest you follow the smart ladies over at Make It Perfect. It was well written and even I could follow it. I just took a few pics of my sewing experience.
Measuring - I know....I had to do it or it wasn't going to work!
This is actually a cool way to cut out a perfect circle. Fold your fabric in 4 and measure out from the lower left corner the same length at several different intervals.
Awww....I just realized I have on my Duran Duran John Taylor tee in this pic.....I should have been facing forward so you could see all of his awesomeness! I heart him foreva!
So once you make your little marks all the way from the right to the left you should have half an arc (?) and then....
you just cut around, going through all four layers of material and NOT scratching the dining table with your sharp mom sewing scissors.
I think #1 Daughter got a little carried away with the "cutting" pics. It's a miracle I tore her away from the Disney Channel for so long!
Yay! A circle!
See how it's quartered when you unfold it? Yea - that doesn't really mean anything...
Put atop (like that word? yea - me too! :)) your other fabric. This is an old shower curtain from PB I bought years ago on sale or clearance or something. I had two, the other panel is now gracing my outdoor bar chairs that I recovered. And now I have none! Anywho...cut your other circle by following your first pretty circle.
Now you put a button hole here and on the other side directly across from it. About 2 inches in. Make sure they are directly across from one another. For more specific direction please see Make It Perfect's tut!
Wow! My first buttonhole thingy made with my sewing machine. I am so proud of myself! This is where your drawstring will go once it's all sewn together.
The other one...twins!
Put your circles back together. Inside out. Right sides facing each other. Top facing top. I know this concept took me a long time to get. Told you I am not a sewer. You're almost there....
Pin. Now I don't like pinning because it's too much prep work for me. But you pretty much just have to suck it up and do it. If you want it to work out. Nicely that is.... At this point I must have forgot to take pics because I don't have anymore. But you sew all the way around the edge, save for a few inches where you turn it inside out or right side in. Whatever. Sew all the way around the edge. Don't forget the few inches to turn it out!
Turn it out and tuck your few inches in and sew those. Then sew all the way round again but make sure you are sewing past your buttonhole. This is making the casing for your drawstrings. Capeche? If not see http://tonicoward.blogspot.com/2010/09/lego-sack-tutorial.html this ladies instructions. She is a much finer sewer than I.
Put in your drawstring. We used some leftover cording from my wingback chair recover. Another post I haven't gotten around to writing yet. Use a big safety pin to thread it through your pretty button holes.
Yay! Done!
Other side
This is Jack Attack. He loves his Lego Sack!
Make one - your piggies will thank you.
And you will thank you for finally figuring out how to use that buttonhole thingy, it really is easy.
So weird.
Since I made this he actually enjoys keeping his masses of Lego's together. And he's told all his friends about it! I think I might be making a few of these for some Bday parties coming up. I'm not sure if the kid will love it but I'll be a star in the mom's eyes! LOL
Be Blessed! XOXO Lisa
 .
.


Comments
Post a Comment
I love to know your thoughts. Please leave a comment below.