How To: Union Jack Dresser Tutorial
I have been wanting to attempt a Union Jack Dresser Makeover ever since I saw Miss Mustard Seed's....
And lately they have been all over Pinterest. So I decided today was the day to go for it! I also wrote a tutorial along the way because I couldn't find one. There are a few ways to do it but since I'm English I decided to be true to my homeland and do it the right way. I'm not saying another way isn't right I'm just saying I wanted to follow an accurate drawing. So I used this one
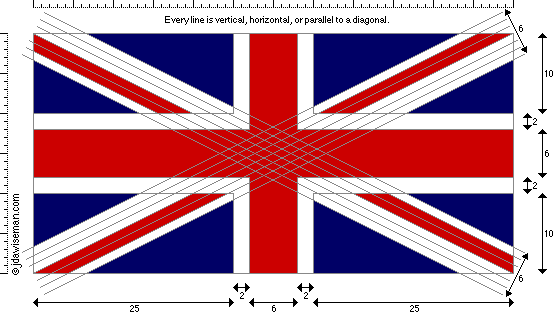
This is from a website called jdawiseman.com. There is a lot of good info there about how this Union Jack is correct and some others aren't. It also has a good history of how the Union Jack came to be. Very interesting!
The Union Jack is all straight edges and angles. Just like English folk, LOL....I can say that I'm English.....double LOL. Thus you will need a straight edge (I used my husbands level) for this project. FYI this is my 2nd attempt at this and it is a little daunting but well worth it.
Supplies:
1. Long ruler or level (straight edge)
2. Frog tape or painters tape
3. A dresser! or you can just make a sign or paint it on a box, a wall, etc...
4. pencil or chalk
5. second smaller ruler
6. paint (3 colors)
7. patience!
It would be a good idea to read through all of the directions first and look at the website mentioned above. Study it for a few minutes and familiarize with the lines of the flag. They are not even mirror images of one another (left vs. right). Which as a child I can remember this bothered me very much. I wanted each side to match! But they don't. Anywho onto directions....
Instructions:
1. Draw a straight line from corner to corner, twice. Like this:

2. Draw 6 more corner to corner lines, mine are 1/2" apart. Make two dots at either corner and line them up. Like this:

3. Do the same from the other corner. So you should have a bunch of lines like this:

4. In the middle of all the stripes you should have made a bunch of diamonds. Count in 2 diamonds from the left corner and draw a line thru the point where the 2nd diamond ends and the 3rd one begins, line up all diamonds above and below this point with your straight edge. When you line the diamonds up you are going to go thru the middle of all of them above and below. Mark a line:

5. Do the exact same thing to the other side, this is to make the Cross of St. George, the large red cross in the middle of the flag. Count in 2 diamonds from the right and line them up thru the middle of the diamonds above and below and mark a line all the way from top to bottom of your top of dresser. You should have two lines in the middle running vertically.
6. Now make the horizontal line of the Cross of St. George by going thru the top of the very tippy top diamond from left point to right point. Use your straight edge to go all the way across. Measuring the thickness of your vertical line and that's how wide your horizontal line will be. Mark a line.

This is not going to be completely even on all points, just try and do the best you can. Its supposed to be as twice wide as it is high. So unless your piece of furniture is exact then that's why it won't be totally even. But it will still look great and hopefully no one is going to measure your Union Jack table!
You should have this so far:

See how I made a few mistakes and tried to erase my lines? Chalk paint isn't very forgiving when it comes to erasing. But this will be covered by paint anyway. My diamonds are not perfectly in the middle but we won't be looking at diamonds once it's all painted.
If you need another point to make a straight even horizontal line what I did was use my little ruler to measure from the top of my level (straight edge)while it was lined up on the center diamond to the upper edge of the dresser. I did this on both sides and made a mark and then joined the two points.
7. So know all you have to do is a few more lines. Now the lines around the Cross of St. George, (the shadow lines if you will) are approximately a 1/3 of the size of the Cross. Don't lose me here, almost done. So if my cross measures 3" my shadow line is going to be 1" wide. So mark those now, they go all the way around. Like this:

I used chalk for this because my pencil lead was gone at this point and I had a piece of chalk laying around, now I wish I would of used chalk for this whole thing as the pencil is going to be hard to erase. Oh well that's what paint is for right?
Now at this point you've marked everything out and you just have to paint. My dresser is gray so I want to use blue and white for my flag with the gray as the 3rd color. Whatever you choose you should use 3 colors that complement one another. Or don't it's your choice.
This is where the FrogTape comes in. I used my FrogTape to mark off the lines I want to paint first. Start with your inside lines first.
8. Mark lines of St. Georges' Cross with FrogTape and then paint. I'm using gray here which is the same color as my dresser but since I have so many pencil lines I'm going to give it another coat.

9. Pull off FrogTape immediately when done painting. I use ASCP because I love how fast it dries and I can move on! See here:

10. Now you are ready to start working on the triangular shapes within the flag. Start with upper left corner. Remember all those annoying lines well here is when we are going to use them.

11. Tape off lines for the triangular shapes. For me these are going to be ASCP duck egg blue.This diagram is really helpful for taping off lines. So depending on what colors you are using follow the diagram below. My blue will coincide with the blue in the original flag below. Be sure to use your lines and double check the diagram before taping.
Once finished you should have 8 triangular shapes painted. I only completed 5 here, but was anxious to see what it looked like so I started pulling off tape before I was done painting.

When you are pulling off old tape lines please pull gentle. If your other paint isn't dry then it may peel a little and you don't want that unless you are planning on heavily distressing the whole piece. Which for me after all this work I do not want to do! But I did end up going back over the parts that came off with a little angled paintbrush for touch ups.
12. Now you should wait for your paint to dry a little more before taping off the 3rd set of lines. Again refer to the diagram above for taping off your 3rd set of lines. Mine will be painted in ASCP Antique White. Similar to white in the original flag.
Picture of 3rd set of taped off lines here:

I think I'm ready to paint. All I can say is keep referring back to the above diagram of the flag. Even if you think you've taped it all right. There were a lot of times I thought I had taped everything right and then I looked again at the diagram and I was so wrong. Also when fitting your tape to a specific section it helps to use your ruler as a straight edge and gently, with a razor blade, cut off your sections you need to go into a tight corner. See picture below of how I did this:

Be gentle, remember you are making a cut along an edge you've already painted. It doesn't take much pressure to cut through the tape and it should just pull apart.
Once you are all taped up and you've checked and checked again you are ready for your 3rd paint color! Good luck and I hope it turns out great! I know I am so excited about how mine turned out. I love it.


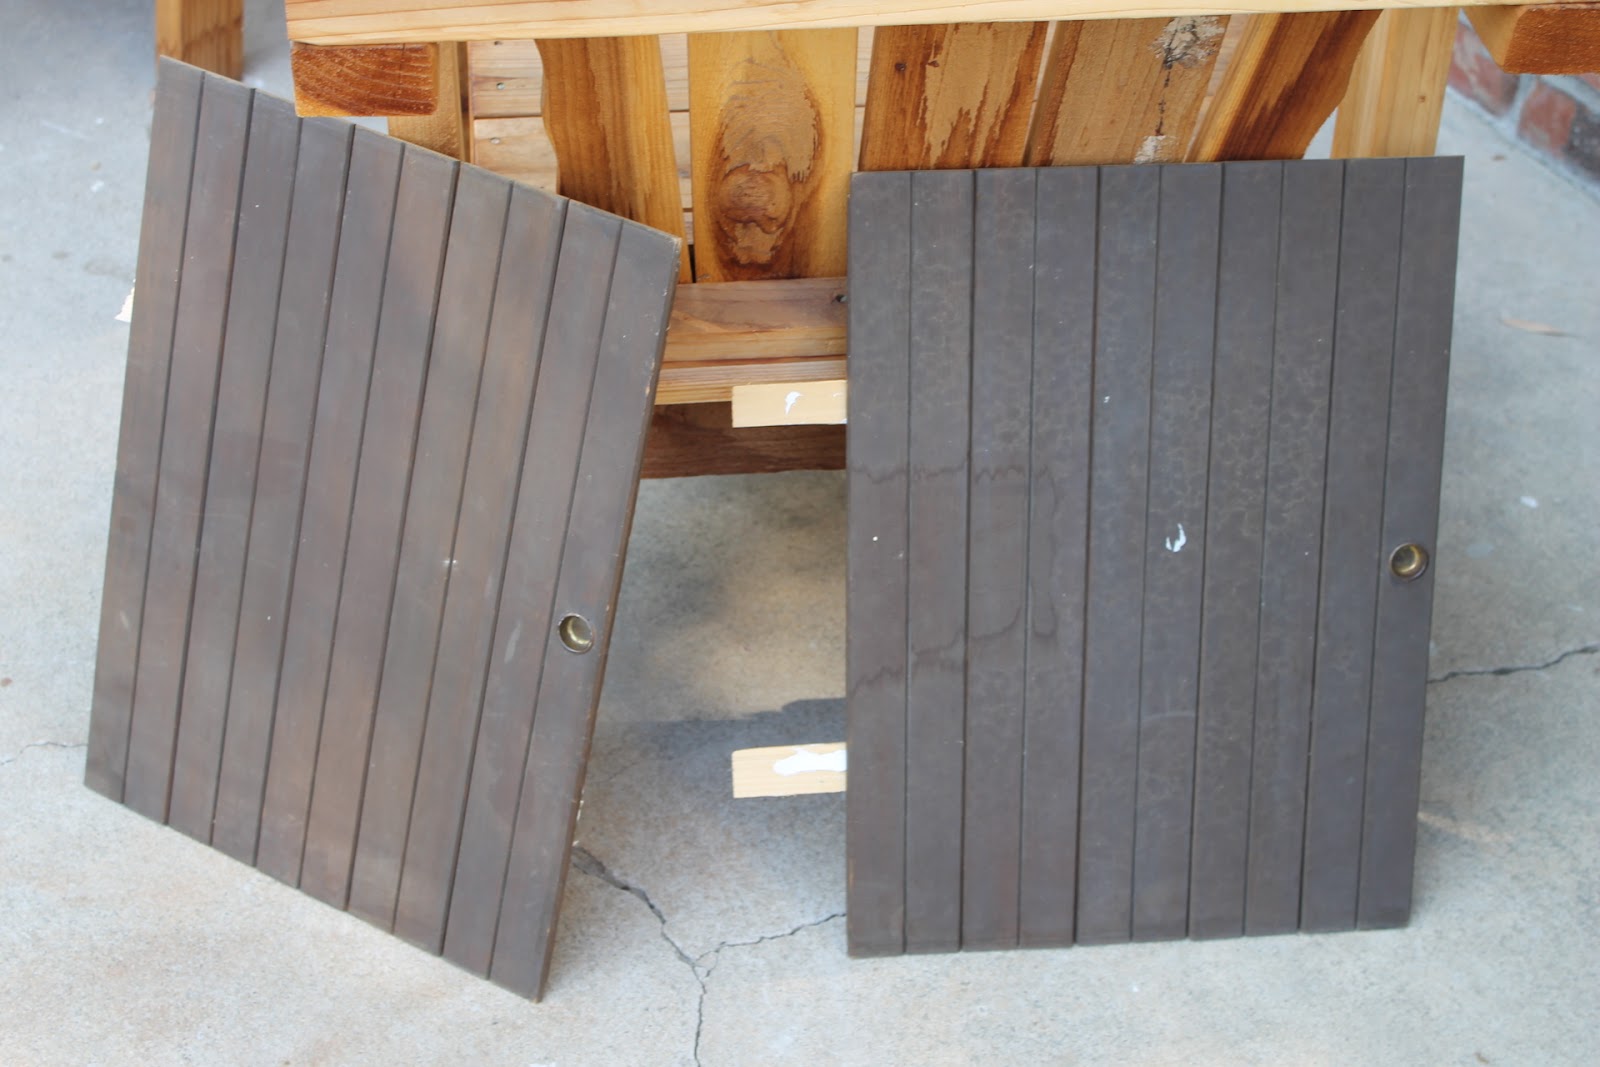
Oh yeah and here's a before picture. This too was a curbside find!


Now I just need to figure out where to put it....
Be Blessed XO, Lisa
** Please, I am in no way a professional painter, just a girl who likes to find trash and make it pretty. Proceed at your own risk and have fun!


This is from a website called jdawiseman.com. There is a lot of good info there about how this Union Jack is correct and some others aren't. It also has a good history of how the Union Jack came to be. Very interesting!
The Union Jack is all straight edges and angles. Just like English folk, LOL....I can say that I'm English.....double LOL. Thus you will need a straight edge (I used my husbands level) for this project. FYI this is my 2nd attempt at this and it is a little daunting but well worth it.
Supplies:
1. Long ruler or level (straight edge)
2. Frog tape or painters tape
3. A dresser! or you can just make a sign or paint it on a box, a wall, etc...
4. pencil or chalk
5. second smaller ruler
6. paint (3 colors)
7. patience!
It would be a good idea to read through all of the directions first and look at the website mentioned above. Study it for a few minutes and familiarize with the lines of the flag. They are not even mirror images of one another (left vs. right). Which as a child I can remember this bothered me very much. I wanted each side to match! But they don't. Anywho onto directions....
Instructions:
1. Draw a straight line from corner to corner, twice. Like this:

2. Draw 6 more corner to corner lines, mine are 1/2" apart. Make two dots at either corner and line them up. Like this:

3. Do the same from the other corner. So you should have a bunch of lines like this:

4. In the middle of all the stripes you should have made a bunch of diamonds. Count in 2 diamonds from the left corner and draw a line thru the point where the 2nd diamond ends and the 3rd one begins, line up all diamonds above and below this point with your straight edge. When you line the diamonds up you are going to go thru the middle of all of them above and below. Mark a line:

5. Do the exact same thing to the other side, this is to make the Cross of St. George, the large red cross in the middle of the flag. Count in 2 diamonds from the right and line them up thru the middle of the diamonds above and below and mark a line all the way from top to bottom of your top of dresser. You should have two lines in the middle running vertically.
6. Now make the horizontal line of the Cross of St. George by going thru the top of the very tippy top diamond from left point to right point. Use your straight edge to go all the way across. Measuring the thickness of your vertical line and that's how wide your horizontal line will be. Mark a line.

This is not going to be completely even on all points, just try and do the best you can. Its supposed to be as twice wide as it is high. So unless your piece of furniture is exact then that's why it won't be totally even. But it will still look great and hopefully no one is going to measure your Union Jack table!
You should have this so far:

See how I made a few mistakes and tried to erase my lines? Chalk paint isn't very forgiving when it comes to erasing. But this will be covered by paint anyway. My diamonds are not perfectly in the middle but we won't be looking at diamonds once it's all painted.
If you need another point to make a straight even horizontal line what I did was use my little ruler to measure from the top of my level (straight edge)while it was lined up on the center diamond to the upper edge of the dresser. I did this on both sides and made a mark and then joined the two points.
7. So know all you have to do is a few more lines. Now the lines around the Cross of St. George, (the shadow lines if you will) are approximately a 1/3 of the size of the Cross. Don't lose me here, almost done. So if my cross measures 3" my shadow line is going to be 1" wide. So mark those now, they go all the way around. Like this:

I used chalk for this because my pencil lead was gone at this point and I had a piece of chalk laying around, now I wish I would of used chalk for this whole thing as the pencil is going to be hard to erase. Oh well that's what paint is for right?
Now at this point you've marked everything out and you just have to paint. My dresser is gray so I want to use blue and white for my flag with the gray as the 3rd color. Whatever you choose you should use 3 colors that complement one another. Or don't it's your choice.
This is where the FrogTape comes in. I used my FrogTape to mark off the lines I want to paint first. Start with your inside lines first.
8. Mark lines of St. Georges' Cross with FrogTape and then paint. I'm using gray here which is the same color as my dresser but since I have so many pencil lines I'm going to give it another coat.

9. Pull off FrogTape immediately when done painting. I use ASCP because I love how fast it dries and I can move on! See here:

10. Now you are ready to start working on the triangular shapes within the flag. Start with upper left corner. Remember all those annoying lines well here is when we are going to use them.

11. Tape off lines for the triangular shapes. For me these are going to be ASCP duck egg blue.This diagram is really helpful for taping off lines. So depending on what colors you are using follow the diagram below. My blue will coincide with the blue in the original flag below. Be sure to use your lines and double check the diagram before taping.
Once finished you should have 8 triangular shapes painted. I only completed 5 here, but was anxious to see what it looked like so I started pulling off tape before I was done painting.

When you are pulling off old tape lines please pull gentle. If your other paint isn't dry then it may peel a little and you don't want that unless you are planning on heavily distressing the whole piece. Which for me after all this work I do not want to do! But I did end up going back over the parts that came off with a little angled paintbrush for touch ups.
12. Now you should wait for your paint to dry a little more before taping off the 3rd set of lines. Again refer to the diagram above for taping off your 3rd set of lines. Mine will be painted in ASCP Antique White. Similar to white in the original flag.
Picture of 3rd set of taped off lines here:

I think I'm ready to paint. All I can say is keep referring back to the above diagram of the flag. Even if you think you've taped it all right. There were a lot of times I thought I had taped everything right and then I looked again at the diagram and I was so wrong. Also when fitting your tape to a specific section it helps to use your ruler as a straight edge and gently, with a razor blade, cut off your sections you need to go into a tight corner. See picture below of how I did this:

Be gentle, remember you are making a cut along an edge you've already painted. It doesn't take much pressure to cut through the tape and it should just pull apart.
Once you are all taped up and you've checked and checked again you are ready for your 3rd paint color! Good luck and I hope it turns out great! I know I am so excited about how mine turned out. I love it.


Oh yeah and here's a before picture. This too was a curbside find!

Now I just need to figure out where to put it....
Be Blessed XO, Lisa
** Please, I am in no way a professional painter, just a girl who likes to find trash and make it pretty. Proceed at your own risk and have fun!
I am Linking up to to:

Looks great! I have yet to attempt a union jack. I really like the colours you chose for yours.
ReplyDeletethank-you so much for the tutorial. I've wanted to try to paint the Union Jack but had no idea how to begin!
ReplyDelete